Slack App
Zipper is a great option for building Slack apps! Here's why:
- Zipper handles the OAuth flow for you. You can get a token for a user or workspace without writing any code.
- You can start receiving webhooks from Slack immediately, without needing to set up a server or configure a tunnel from localhost to the internet.
- Zipper provides built-in storage for your app's data, so you don't have to worry about setting up a database.
In this example, we'll demonstrate by building a simple Slack app that listens for newly created channels, posting a weekly message to #general with a summary of channels that were created. We'll use the Slack Events API (opens in a new tab) to listen for channel creation events and the Slack Web API (opens in a new tab) to post messages.
1. Create a new applet
Sign in (opens in a new tab) to your Zipper account. On your dashboard, click the + Create Applet button. Provide a name for your applet (or use the generated name). When prompted to start from a template, choose the "Hello World" template.
2. Prepare to receive events from Slack
Replace the contents of main.ts with the following code:
type SlackEvent = {
  challenge: string;
};

export async function handler({ ...slackEvent }: SlackEvent) {
  if (slackEvent.challenge) {
    return slackEvent.challenge;
  }

  return new Response('ok', { status: 200 });
}
We now have a function that receives the verification challenge from Slack and responds with the challenge value.
Next, we'll create an app in Slack to confirm that our code works. This is the first step to being able to receive events from Slack's Events API.
Before moving on to the next step, we publish our changes by clicking Publish and then Update in the top right of the page. This also shows us our applet's URL.
3. Create a Slack app
We head over to api.slack.com/apps (opens in a new tab) and create a new app. We choose to create an app "From scratch," give it a name, and choose a workspace. After the app is created, we're taken to the app's settings page.
Subscribe to an event
We navigate to the "Event Subscriptions" page and click to enable events.
For the event Request URL, we will enter our Zipper applet URL followed by /raw. Slack will send a test challenge to your applet to verify that it responds to the challenge.
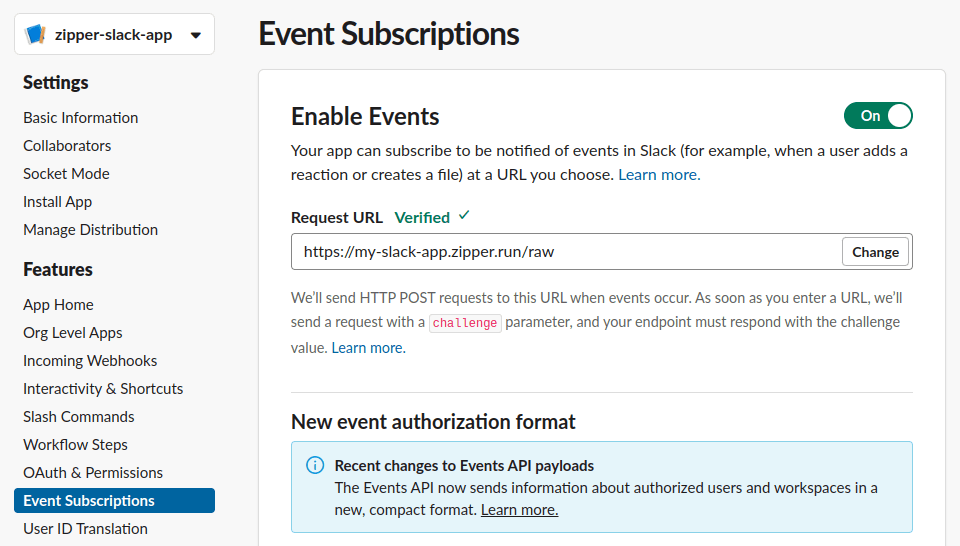
We see a green checkmark after a few seconds indicating that Slack sent a request to our applet and received a response.
On the same page, we want to "Subscribe to Bot Events" and add the channel_created event.
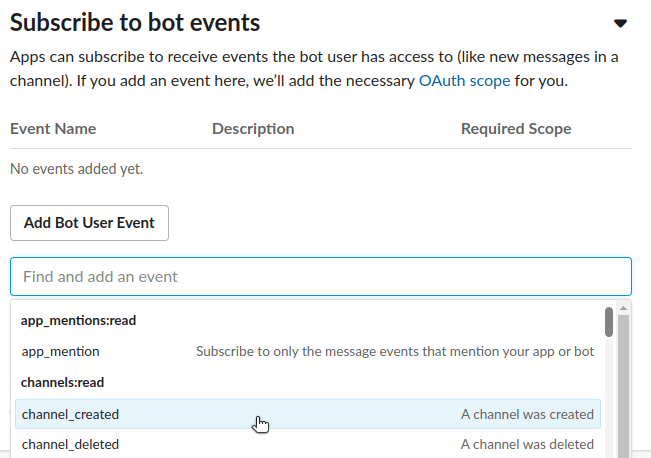
Click Save Changes.
Configure OAuth
Before installing our Slack app, we need to add an OAuth scope. We navigate to the "OAuth & Permissions" page and scroll down to the "Scopes" section. Under "Bot Token Scopes," we click Add an OAuth Scope and select the chat:write scope.

Install app to workspace
Before we can start receiving events, we need to install our app to our workspace. We navigate to the "Basic Information" page and click Install to Workspace, following the remaining prompts to install our app.
4. Save info about new channels
Now that we can recieve events from Slack, let's make sure we're actually saving the information we care about—the channel's ID, name, creation date, and creator's ID. We'll also save the team ID so we can retrieve the channel info later.
In our Zipper applet code, we'll replace the contents of main.ts with the following:
export type SlackChannel = {
  id: string;
  name: string;
  created: number;
  creator: string;
};

type SlackEvent = {
  challenge: string;
  type: string;
  event: {
    type: string;
    channel: SlackChannel;
  };
};

export async function handler({ ...slackEvent }: SlackEvent) {
  if (slackEvent.challenge) {
    return slackEvent.challenge;
  }

  if (slackEvent.type === 'event_callback') {
    if (slackEvent.event.type === 'channel_created') {
      Zipper.storage.set(slackEvent.event.channel.id, slackEvent.event.channel);
    }
  }

  return new Response('ok', { status: 200 });
}
Our updated handler function will receive the channel_created event and save it our applet's built-in storage. Our function will do this asynchronously so that it can respond to Slack right away, before Slack tries to resend the event.
5. Get a token for the Web API
Now that we're saving channel info, let's post a message to the #general channel every week with a summary of the channels that were created. To do this, we'll need a token for the Slack Web API.
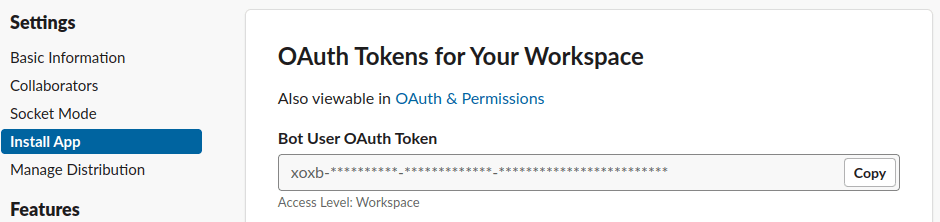
In our Slack app's settings, we navigate to the "Install App" page and copy the "Bot User OAuth Token".
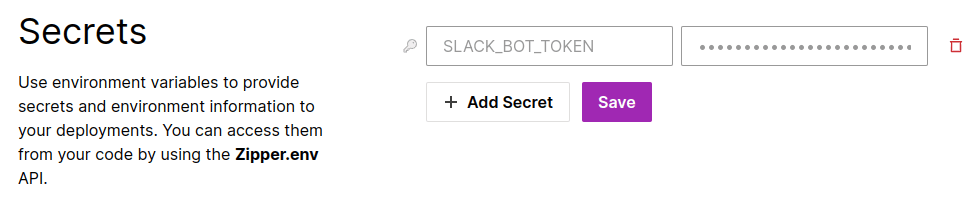
Back in our Zipper applet, we navigate to the "Secrets" page and add a new secret with key SLACK_BOT_TOKEN and paste in the value of the token we just copied from Slack. We click Save.
6. Post a message
We'll add a new file called post-message.ts with the following code:
import { SlackChannel } from './main.ts';
import { WebClient } from 'https://deno.land/x/slack_web_api@6.7.2/mod.js';

const sevenDays = 1000 * 60 * 60 * 24 * 7;

export async function handler() {
  const client = new WebClient(Deno.env.get('SLACK_BOT_TOKEN'));
  const channels: Record<string, SlackChannel> = await Zipper.storage.getAll();
  const today = new Date();
  const sevenDaysAgo = +today - sevenDays;

  const recentChannels = Object.values(channels).filter((c) => {
    const createdMs = c.created * 1000;
    return createdMs >= sevenDaysAgo;
  });

  if (recentChannels.length > 0) {
    const channelString = recentChannels
      .map((c) => `<#${c.id}>`)
      .join(' \n • ');
    await client.chat.postMessage({
      channel: 'general',
      blocks: [
        {
          type: 'section',
          text: {
            type: 'mrkdwn',
            text: 'In the last week, the following channels were created:',
          },
        },
        {
          type: 'section',
          text: {
            type: 'mrkdwn',
            text: `• ${channelString}`,
          },
        },
      ],
    });
    return recentChannels;
  }

  return 'No recently created channels';
}
This handler function fetches all the stored channels, filtering to retrieve those that were created within the last seven days. If there are any recent channels, it posts a message to #general with a summary of the channels that were created.
Before we can run this function, we make sure that our Slack app is a member of #general. We can do this by mentioning the bot in #general and then clicking the Invite to Channel button.
7. Test it out
To test out our applet from end to end, we create a new public channel in our Slack workspace. Then, we run our applet's post-message.ts file. Our applet posts a message in #general with a summary of the newly created channel.
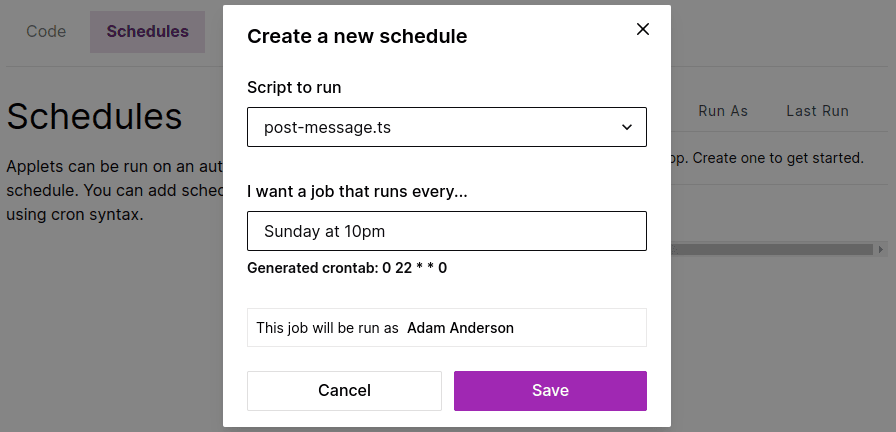
8. Schedule the applet run
With everything up and running, it's simple to schedule our applet to run on a weekly basis. We navigate to the Schedule page for our applet and add a new schedule.